Arvados 2.4 now supports using GPUs, specifically the NVIDIA CUDA platform. In this blog post, we will show an example of running a TensorFlow machine learning demo on Arvados.

About the GPU Demo

We will be running using a demo that uses TensorFlow. TensorFlow is a free and open-source software platform used for machine learning and artificial intelligence with a focus on neural networks. This 
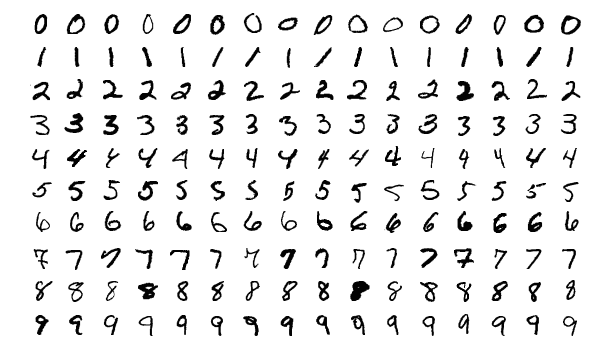
TensorFlow demo trains a neural network to create a classifier that identifies handwritten digits. It uses data from a famous dataset, the MNIST handwritten digit dataset, which is a large database of images of handwritten digits. It is a classic “real-world” dataset used by those wishing to learn more about machine learning. Each image is stored as 28x28 pixels (28x28 matrix of grayscale values).

Sample images from the MNIST database

Sample images from the MNIST database (By Josef Steppan - Own work, CC BY-SA 4.0)

The demo has several main steps:

  1. Load and Preprocess a Training Set: This includes loading in the handwritten digits data, normalizing by 250 and converting the integers to double precision numbers. The data loaded in is already divided into a test and training set.
  2. Build a Neural Network: In this case, a sequential model is used to create the neural network. The model is created to take in an input of an image (28 x 28) and return the probability that the image is each class (i.e. 0-9).
  3. Train the Neural Network: The model is trained (i.e.the model parameters are adjusted to minimize the chosen loss function) using the training data.
  4. Evaluate Accuracy of the Neural Network: The model is then tested on the “test-set”. This means, the model is run to classify images that were not used to train the model. Then the accuracy is calculated on how well the model did on predicting the actual digit in these new images. The classifier is found to have ~98% accuracy on the testing set.

This is implemented using the following TensorFlow script (tf-mnist-tutorial.py) (derived from TensorFlow 2 quickstart for beginners):

import sys
import numpy
import tensorflow as tf
print("TensorFlow version:", tf.__version__)
with numpy.load(sys.argv[1], allow_pickle=True) as f:
x_train, y_train = f['x_train'], f['y_train']
x_test, y_test = f['x_test'], f['y_test']
x_train, x_test = x_train / 255.0, x_test / 255.0
model = tf.keras.models.Sequential([
tf.keras.layers.Flatten(input_shape=(28, 28)),
tf.keras.layers.Dense(128, activation='relu'),
tf.keras.layers.Dropout(0.2),
tf.keras.layers.Dense(10)
])
predictions = model(x_train[:1]).numpy()
print(predictions)
print(tf.nn.softmax(predictions).numpy())
loss_fn = tf.keras.losses.SparseCategoricalCrossentropy(from_logits=True)
print(loss_fn(y_train[:1], predictions).numpy())
model.compile(optimizer='adam',
loss=loss_fn,
metrics=['accuracy'])
print(model.fit(x_train, y_train, epochs=5))
print(model.evaluate(x_test, y_test, verbose=2))
probability_model = tf.keras.Sequential([
model,
tf.keras.layers.Softmax()
])
print(probability_model(x_test[:5]))

Using the model

The ultimate output is a trained and tested neural network model (e.g. the model) that can be used to identify digits from new unclassified images. The model can then be applied to novel input to make classification decisions.

predictions = model(input)

Gives log-odds for each possible digit classification

probabilities = tf.nn.softmax(predictions).numpy()

Converts log-odds to probabilities for each possible digit classification

This can also be written by adding the softmax step into the model itself:

probability_model = tf.keras.Sequential([model,tf.keras.layers.Softmax()])
probabilities = probability_model(input)

With the array of probabilities, one can determine a classification by finding the highest probability of match over a threshold.

Running the Demo on Arvados

Now we wrap the TensorFlow Python script with a Common Workflow Language (CWL) CommandLineTool to specify the Docker image that provides the TensorFlow software environment, the amount of RAM needed, and the GPU requirement. Arvados supports the CWL extension cwltool:CUDARequirement to request nodes with NIVIDA GPUs. This requirement also declares CUDA version and minimum compute capability needed to run your tool, which Arvados will use to select the correct compute environment to run the job. And, that is all that is needed to run your GPU-ready code on Arvados!

cwlVersion: v1.2
class: CommandLineTool
$namespaces:
  cwltool: "http://commonwl.org/cwltool#"
requirements:
  DockerRequirement:
    dockerPull: tensorflow/tensorflow:2.6.0-gpu
  ResourceRequirement:
    ramMin: 4000
  cwltool:CUDARequirement:
    # https://www.tensorflow.org/install/gpu
    # tensorflow requires CUDA 11.2 and minimum compute capability 3.5
    cudaVersionMin: "11.2"
    cudaComputeCapability: "3.5"
inputs:
  script:
    type: File
    default:
      class: File
      location: tf-mnist-tutorial.py
    inputBinding:
      position: 1
  mnist:
    type: File
    default:
      class: File
      location: https://storage.googleapis.com/tensorflow/tf-keras-datasets/mnist.npz
    inputBinding:
      position: 2
outputs: []
baseCommand: python

The demo and demo output are available on the Arvados playground for easy reference.

Try it yourself!

If you liked this example, feel free to replicate it with a free account on the Arvados playground, or have a look at the documentation for installing Arvados. Alternatively, Curii Corporation provides managed Arvados installations as well as commercial support for Arvados. Please contact info@curii.com for more information.